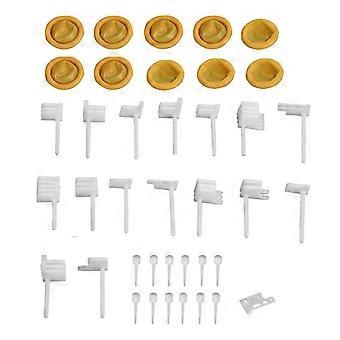
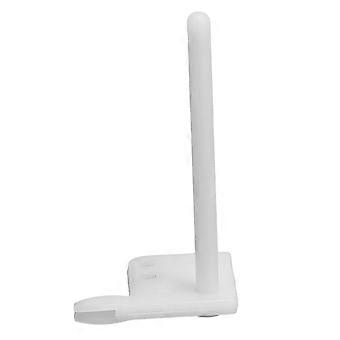
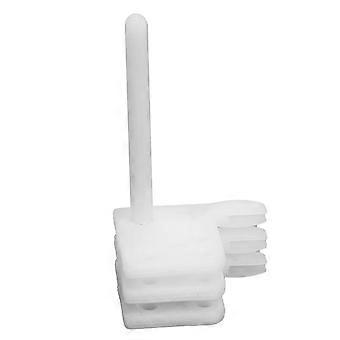
Hard Drive Head Replacement Comb for Tip Stacking Assembly HSA Repair Tools Kit 2.5/3.5in
FREE Shipping


Hard Drive Head Replacement Comb for Tip Stacking Assembly HSA Repair Tools Kit 2.5/3.5in
- Brand: Unbranded
Hard Drive Head Replacement Comb for Tip Stacking Assembly HSA Repair Tools Kit 2.5/3.5in
- Brand: Unbranded
Save £15.00 (20%)
RRP
14-Day Returns Policy
Save £15.00 (20%)
RRP
14-Day Returns Policy
Payment methods:
Description
Hard Drive Head Replacement Comb for Tip Stacking Assembly HSA Repair Tools Kit 2.5/3.5in
- Brand: Unbranded
- Category: Motherboards
- Fruugo ID: 416905220-879787818
- EAN: 7792047571300
Product Safety Information
Please see the product safety information specific to this product outlined below
The following information is provided by the independent third-party retailer selling this product.
Product Safety Labels

Delivery & Returns
Dispatched within 2 days
-
STANDARD: FREE - Delivery between Mon 19 January 2026–Mon 26 January 2026 - FREE
Shipping from China.
We do our best to ensure that the products that you order are delivered to you in full and according to your specifications. However, should you receive an incomplete order, or items different from the ones you ordered, or there is some other reason why you are not satisfied with the order, you may return the order, or any products included in the order, and receive a full refund for the items. View full return policy
Product Compliance Details
Please see the compliance information specific to this product outlined below.
The following information is provided by the independent third-party retailer selling this product.
Manufacturer
The following information outlines the contact details for the manufacturer of the relevant product sold on Fruugo.
- Wuhan Pinsheng Technology Co., Ltd.
- Wuhan Pinsheng Technology Co., Ltd.
- No.A357,Shoulder-to-shoulder?Incubator,Building?4
- Wuchang District
- Wuhan
- CN
- 430000
- pinsenkj@163.com
- 18062524796
- https://shop01473o1711614.1688.com/page/creditdetail.htm?spm=a261y.7663282.shopNavigation.1.6310755czE9SFQ
Responsible Person in the EU
The following information outlines the contact information for the responsible person in the EU. The responsible person is the designated economic operator based in the EU who is responsible for the compliance obligations relating to the relevant product sold into the European Union.
- None
- Kequ Technology s.r.o.
- Pražákova 1008/69
- Štýřice
- Jihomoravský kraj
- Brno
- CZ
- 63900
- christopher25106@outlook.com
- 420608214795